How to arrange Wooden Embroidery Frame for Aari and Zardosi Embroidery | Maggam Embroidery Frame

In this tutorial, you will learn how you can arrange wooden embroidery frame in simple and easy steps. You can also watch the video of this tutorial here.
Material Required:
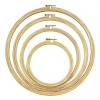
- Wooden Embroidery Frameset which has 4 wooden blocks.
- 3 Inch long sewing needle
- Thread Cutter
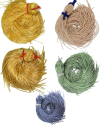
- Cotton thread cord (rope) which has a diameter of 1cm. (Take 2.5 times the length of the frame)
- Any cotton thread of 1mm diameter.
Step-by-Step Instructions:
Step 1: Take a needle and pass the thread through the eye of the needle.
Step 2: Cut the thread around 20 inches and then tie the knot at one end of the thread.

Step 3: Now, take the rope and pass the needle through one end of the rope and tie a half hitched knot.

Step 4: Now, take one big wooden block and pass the needle through the first hole and then in & out of remaining holes until you reach the last hole.


Step 5: Loop the rope around the wooden block two times and then pass the needle back through the last hole.


Step 6: Now, repeat the above process taking the rope in and out of the hole until you reach back at the hole you first started.


Step 7: Now, carefully pull the rope along all the holes so that there is no sagging of rope on both sides.


Step 8: Loop the rope around the wooden blocks two times.

Step 9: Tightly pull both the ropes and tie an overhand knot.

Step 10: Cut the extra rope.

Step 11: Sew both the ropes with thread, pass the thread back through the hole and cut the extra thread.

Step 12: Repeat the above procedure for another wooden block.

Voila! Your wooden embroidery frame is ready for hand embroidery.
We hope that you learned something new from this article.
Follow our social channel:
Facebook: https://goo.gl/ChnxQo
Twitter: https://goo.gl/tpi9YU
YouTube: https://goo.gl/utByfB
Instagram: https://goo.gl/Gw1Qjx
Book your order online @ www.embroiderymaterial.com or
Call us - +91- 8826002179 or
Share your kind suggestions/ inquiries: [email protected]

 +91-8826002179


